
Build 5 Useful ESP32 Desktop Gadgets This Weekend
Enhance your desktop this weekend (Sep 4-6) by building five unique ESP32 gadgets! From custom macro pads to smart clocks, learn to assemble and configure these useful DIY tools.
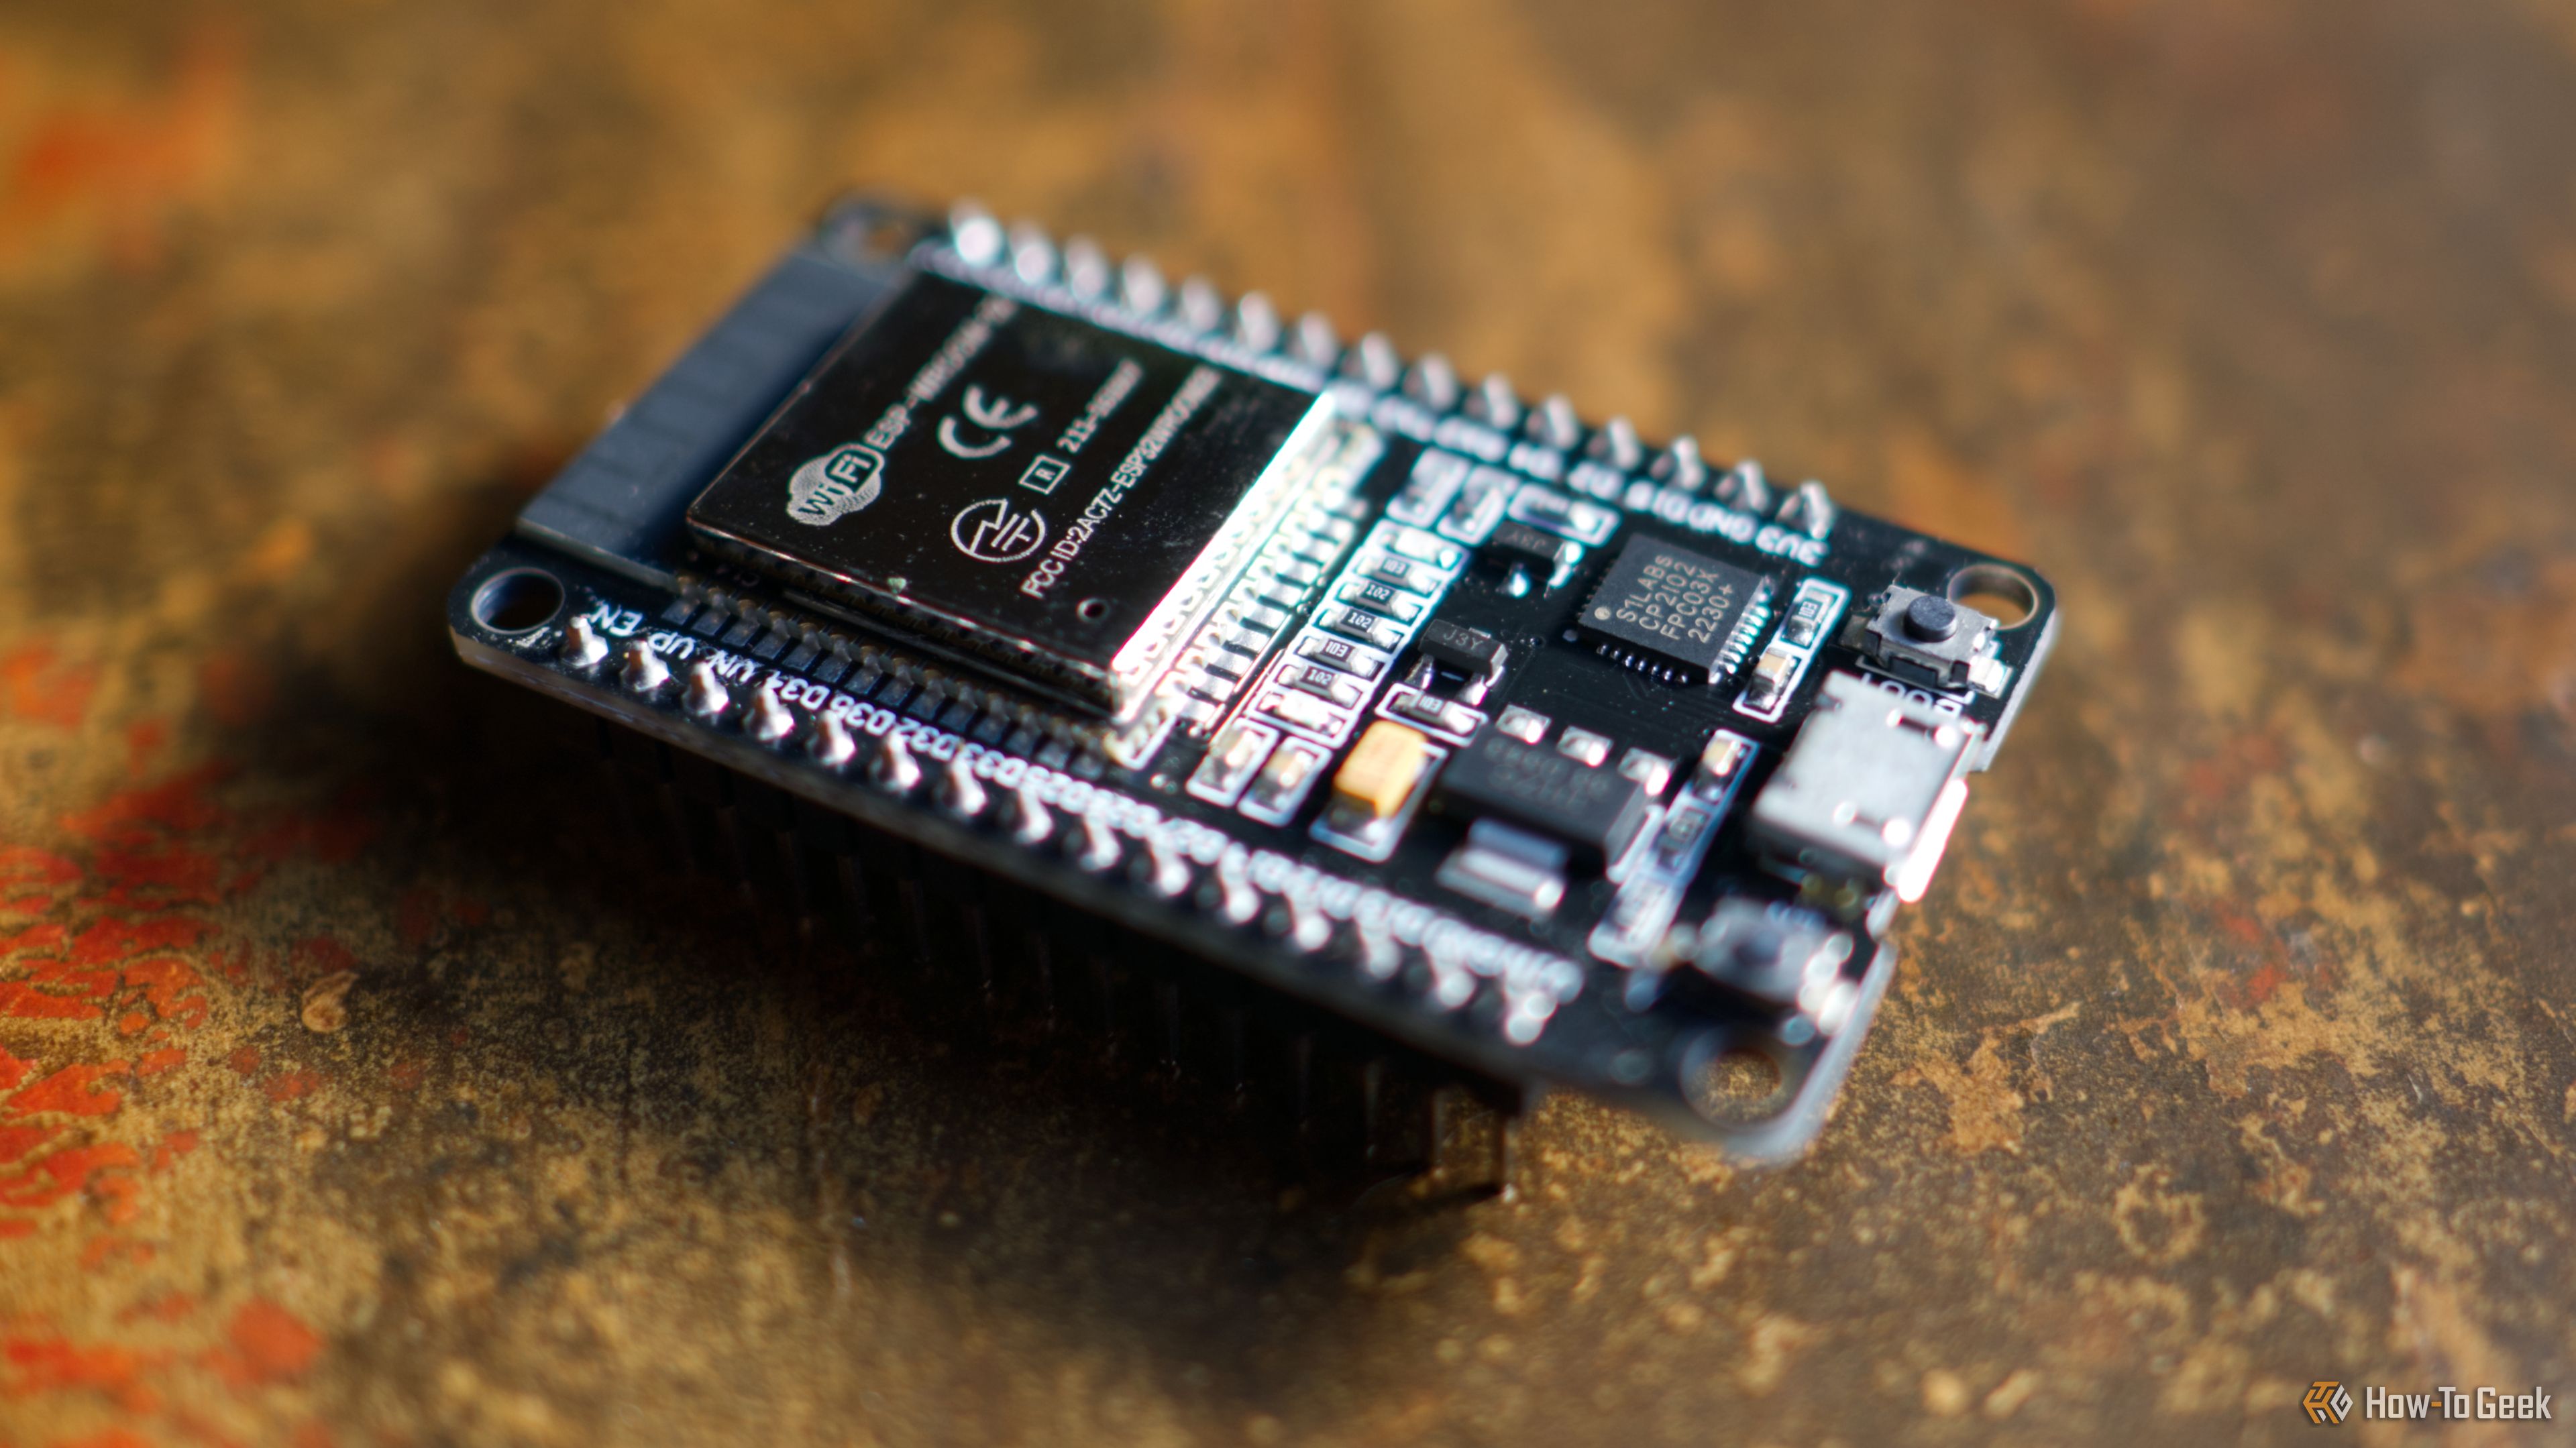
Your desktop is more than just a surface; it's your personal command station. And what's a command station without some custom, high-tech tools to make your life easier and more fun? This weekend, from September 4-6, grab your ESP32 board and a few extra components, because we’re diving into five fantastic desktop gadgets you can build yourself. These projects range from productivity powerhouses to beautiful informational displays, all designed to enhance your workflow and workspace.
Building with the ESP32 is a rewarding experience, combining the satisfaction of hands-on creation with the practicality of modern technology. Whether you’re looking to streamline your digital tasks, monitor your environment, or simply add a touch of personal flair, these easy-to-follow guides will set you on the path to a smarter desktop.
Before You Begin: Essential Prerequisites
To embark on these exciting ESP32 projects, you'll need a few things on hand. Gathering these items first will ensure a smooth and enjoyable building experience.
- An ESP32 Development Board: The heart of all these projects. The source mentions various models like the ESP32-S3, ESP8266, ESP32, ESP32-S2, and ESP32-C3. Having one or more of these will be crucial.
- Additional Electronic Components: Depending on your chosen project, you might need specific displays (TFT, E-Ink, LED matrix), physical buttons, rotary encoders, an inertial measurement unit (IMU), LEDs, and batteries (e.g., a 550mAh for FlipBuddy). Refer to each project’s details for exact requirements.
- A 3D Printer (or Access to One): Many of these projects utilize custom 3D-printed enclosures and components, making a 3D printer a valuable asset. If you don't own one, consider local makerspaces or online printing services.
- Basic Electronics & Soldering Skills: While some projects, like InterDesk, explicitly state no soldering is required, others may involve basic wiring and connections. Familiarity with breadboards and simple circuit assembly is a plus.
- A Computer with Internet Access: You’ll need this for setting up development environments (like Arduino framework with PlatformIO), flashing firmware onto your ESP32, downloading project files from GitHub, and running any necessary companion applications.
- Basic Programming Knowledge: While many projects come with ready-to-flash firmware, understanding a bit of C++ (especially for Arduino) will empower you to customize and troubleshoot your gadgets.
Your Weekend Project Ideas
Let's explore the five useful desktop gadgets you can build.
1. Craft Your Own DIY StreamDeck (SauceDeck)
What it is: The StreamDeck concept is a macro pad designed to give you quick access to frequently used applications and functions. Imagine launching software, executing commands, or even switching cameras during a live stream, all with the press of a custom button.
Key Features of SauceDeck: This particular ESP32-S3-powered device, known as SauceDeck, stands out with its 12 hardware buttons, two rotary encoders, and a vivid TFT display. It’s developed using the Arduino framework with PlatformIO, and its sleek design is achieved through a 3D-printed enclosure and buttons. While default buttons might target apps like Teams or VSCode, the beauty lies in customization—you can design and print your own button labels or use symbols. The rotary encoders are perfect for adjusting computer or microphone volume on the fly.
Your Path to Building This:
- Gather Components: Start by acquiring an ESP32-S3 board, a TFT display, rotary encoders, and the necessary buttons.
- 3D Print: Print the enclosure and custom button caps according to the project’s specifications.
- Program & Flash: Set up your development environment (PlatformIO is recommended) and flash the firmware onto your ESP32-S3.
- Assemble: Carefully wire your components and integrate them into the 3D-printed enclosure.
- Customize: Define your macros and personalize your button labels to match your specific needs.
2. The InterDesk Desktop Switching Tool
What it is: This ingenious little device addresses a common need for those who juggle multiple computers. InterDesk is specifically designed to allow you to control a Windows PC seamlessly from a macOS laptop, though its potential extends to other platforms.
How it Works: Powered by an ESP32-S3, InterDesk functions by receiving keystrokes and mouse input from your macOS device via Bluetooth. It then translates these into standard human interface device (HID) instructions, effectively mimicking input from USB peripherals to your Windows PC. The companion application, built with Electron, React, and TypeScript, ensures broad compatibility across Mac, Windows, and Linux, though the creator notes primary testing was done with the MacBook-to-Windows PC setup.
Your Path to Building This:
- Acquire the ESP32-S3: This is the primary component needed.
- Flash Firmware: The project is incredibly user-friendly, requiring literally no soldering. Simply flash the supplied firmware onto your ESP32-S3 microcontroller.
- Install Companion App: Download and run the Electron-based application on your controlling device (e.g., your MacBook).
- Connect & Control: Establish a Bluetooth connection between your ESP32-S3 and the companion app, and you're ready to switch control.
3. Wi-Fi LED Matrix Clock and Weather Station (ESPTimeCast)
What it is: Sometimes, simplicity yields the most beautiful results. The ESPTimeCast project is a prime example, offering a gorgeous open-source desktop clock and weather station that combines elegance with functionality.
Key Features: This project is versatile, compatible with a range of ESP chips (ESP8266, ESP32, ESP32-S2, ESP32-S3, and ESP32-C3) and utilizes the MAX7219 LED matrix display. Beyond displaying NTP-synced time, ESPTimeCast also shows weather data. It boasts optional features like detecting music and video titles, displaying messages and timers, and even integrating with Home Assistant. Convenience features include firmware installation via a web browser, over-the-air (OTA) updates, and automatic dimming to prevent dazzling you at night. An optional premium 3D-printed enclosure is available for purchase, or you can design your own using materials like wood or a 3D printer.
Your Path to Building This:
- Select Your Board: Choose a compatible ESP development board and a MAX7219 LED matrix display.
- Basic Wiring: This project will introduce you to some fundamental wiring skills as you connect the LED matrix to your ESP board.
- Install Firmware: Use a web browser to easily install the firmware onto your ESP device.
- Configure: Set up options like Wi-Fi credentials, NTP server, and automatic dimming.
- Enclose: Build or purchase an enclosure to give your clock a finished, professional look.
4. This Amazing Pokémon-themed Calendar
What it is: Who says practical gadgets can't be fun? This project transforms a utilitarian calendar into an inspiring piece of desk art, perfect for fans of retro gaming and efficient information display.
Key Features: Built around the LilyGo EPD47, a 4.7-inch ePaper display with an embedded ESP32-S3, this calendar project began as a minimalist idea but evolved into a charming Pokémon battle scene. What looks like a Game Boy screenshot cleverly integrates useful information: today's date, upcoming appointments, current weather conditions, temperature, and humidity. The background battle scene dynamically changes based on the weekday, and the monster sprites adapt to reflect current weather conditions. All this information is sourced from Home Assistant, making it a powerful visual dashboard.
Your Path to Building This:
- Acquire LilyGo EPD47: This specific ePaper display with its integrated ESP32-S3 is central to the project.
- Integrate with Home Assistant: Ensure you have Home Assistant set up, as it's the data source for this calendar.
- Load Code: Upload the project's specific code and firmware to the ESP32-S3 on your LilyGo EPD47.
- Customize & Display: Configure settings to pull the correct data, and then create a suitable stand or simple enclosure to showcase your unique calendar.
5. FlipBuddy Time-Tracker
What it is: For those who find software-based time trackers a bit impersonal, the FlipBuddy offers a tactile and engaging alternative. This time-tracking cube allows you to track activities simply by changing its physical orientation.
How it Works: You define different activities, and then, to start tracking, you set the cube down in a specific orientation. This physical act can be incredibly effective for focusing on tasks like project work, study sessions, or even monitoring your gaming time. The project uses LEDs to indicate the current tracking mode. The enclosure is entirely 3D-printed, and the build requires an ESP32-S3, a 550mAh battery, an inertial measurement unit (IMU) to detect orientation, and LEDs. While the GitHub repository hints at a somewhat complex build process, once it's set up, you can easily download the gathered data through the FlipBuddy web app. For those who prefer convenience, preassembled FlipBuddy units are also available for purchase.
Your Path to Building This:
- Gather Core Components: Secure an ESP32-S3, a 550mAh battery, an IMU, and LEDs.
- 3D Print Enclosure: Print the complete enclosure designed for the FlipBuddy.
- Flash Firmware: Load the project's firmware onto your ESP32-S3.
- Assemble Hardware: Carefully wire and assemble all components within the 3D-printed cube.
- Configure & Use: Set up your activity orientations, and begin tracking. Use the FlipBuddy web app to access your valuable data.
General Tips for Success
Approaching any DIY electronics project can have its challenges, but a few best practices can help you succeed this weekend:
- Start with Clear Goals: Understand what each project entails before you begin. Review the project's GitHub page or documentation thoroughly.
- Test Components: Before final assembly, test individual components (like displays or sensors) to ensure they are working correctly.
- Take Your Time: Rushing can lead to errors. Double-check your wiring and connections.
- Document Your Progress: Take photos or notes, especially if you modify anything. This helps with troubleshooting and future improvements.
- Join Communities: Online forums and communities dedicated to ESP32 projects are invaluable resources for support and inspiration.
Troubleshooting Common Hurdles
Even with careful planning, you might encounter bumps in the road. Here are some common issues and how to approach them:
- Firmware Not Flashing: Ensure your USB cable is data-capable (not just charging), drivers for your ESP32 are installed, and you’ve selected the correct board and COM port in your development environment.
- Component Not Working: Double-check all wiring connections against the project diagram. Verify power supply, especially for displays or power-hungry sensors. Incorrect pin assignments are a frequent culprit.
- Wi-Fi Connectivity Issues: Confirm your Wi-Fi SSID and password are correct in the code. Ensure your ESP32 is within range of your router and receiving adequate power.
- 3D Print Failures: If your enclosure prints aren't coming out right, check your printer's calibration, filament quality, and slicing software settings. Adhesion issues are common; clean your print bed.
- Project-Specific Errors: If you encounter unique errors, consult the project's GitHub issues section or relevant online forums. Chances are, someone else has faced a similar problem.
Beyond the Weekend: Next Steps & Further Exploration
Congratulations on potentially building some incredible desktop gadgets! This weekend is just the beginning. The world of ESP32 projects is vast and continuously expanding. Consider exploring more advanced customization options for your new gadgets, diving deeper into the code to add unique features, or integrating them with your existing smart home setup.
Remember, many of these projects rely on 3D printing for enclosures and custom parts. If you enjoyed that aspect, there are even more ESP32-powered 3D printing projects waiting for you to discover. Keep experimenting, keep building, and continue to personalize your digital and physical workspace!
FAQ
Q: Do I need advanced coding skills to build these projects? A: While basic programming knowledge (like C++ for Arduino) is helpful for customization and troubleshooting, many projects provide ready-to-flash firmware. This means you can often get a functional device by simply uploading pre-written code, making them accessible even if you're not a seasoned developer.
Q: What if I don't own a 3D printer for the enclosures? A: A 3D printer is beneficial for many of these projects, but not strictly mandatory for all. For projects requiring an enclosure, you might be able to find online 3D printing services, use a local makerspace, or even design a simple enclosure out of wood or other readily available materials. Some projects, like ESPTimeCast, even offer premium 3D-printed enclosures for purchase.
Q: How long will these projects realistically take to build over a weekend? A: The time commitment varies per project and your experience level. Projects like InterDesk, with no soldering and minimal assembly, could be completed in just a few hours. Others involving more wiring, 3D printing time, and custom coding (like the SauceDeck or FlipBuddy) might take a significant portion of the weekend. Planning ahead and gathering all components beforehand will help ensure you can tackle your chosen build within the September 4-6 timeframe.
Related articles
How to Use Kodi: The Simple, Server-Free Way to Watch Your Media
Learn to set up Kodi to watch your personal media library directly on your TV, bypassing complex servers and subscription fees, in just a few steps.

Understanding the Anti-Woke Right's Challenge with Grand Theft Auto VI
Welcome to this guide on understanding the current cultural conversation surrounding the highly anticipated game, Grand Theft Auto VI. This resource is designed to help you navigate the specific challenges and

How to Quote Movies Accurately - Avoid Common Misquotes
Learn to identify and correct 10 frequently misquoted movie lines to impress your friends and become a true cinematic aficionado.
Unofficial Sony Headphone PC Apps: Ditch Your Phone, Take Control
Tired of Sony's mobile app? These unofficial, open-source PC tools like Sony Device Center and SonyBridge offer desktop control over your Sony headphones' ANC, EQ, and more. A convenient, albeit unofficial, solution for Windows, Linux, and Mac users looking to ditch their phone for audio adjustments.

How to Choose and Maximize Your Bissell Pet Carpet Cleaner Deal
Dealing with unexpected pet messes or persistent carpet stains can be a real headache. Whether it’s muddy paw prints, accidental spills, or allergens from pet dander, keeping carpets clean and fresh is an ongoing

Ace Combat 8 Takes Flight with Star-Studded Prequel Series
Ace Combat 8: Wings of Theve is launching soon, but not before a live-action prequel miniseries, Hour Zero, drops exclusively on IGN. Starring Josh Holloway, Brandon Routh, and Tamlyn Tomita, this four-part show will build narrative context for the game's campaign, starting September 15. Holloway shared his renewed love for gaming and a desire to adapt games into movies.